 Arboris Botanical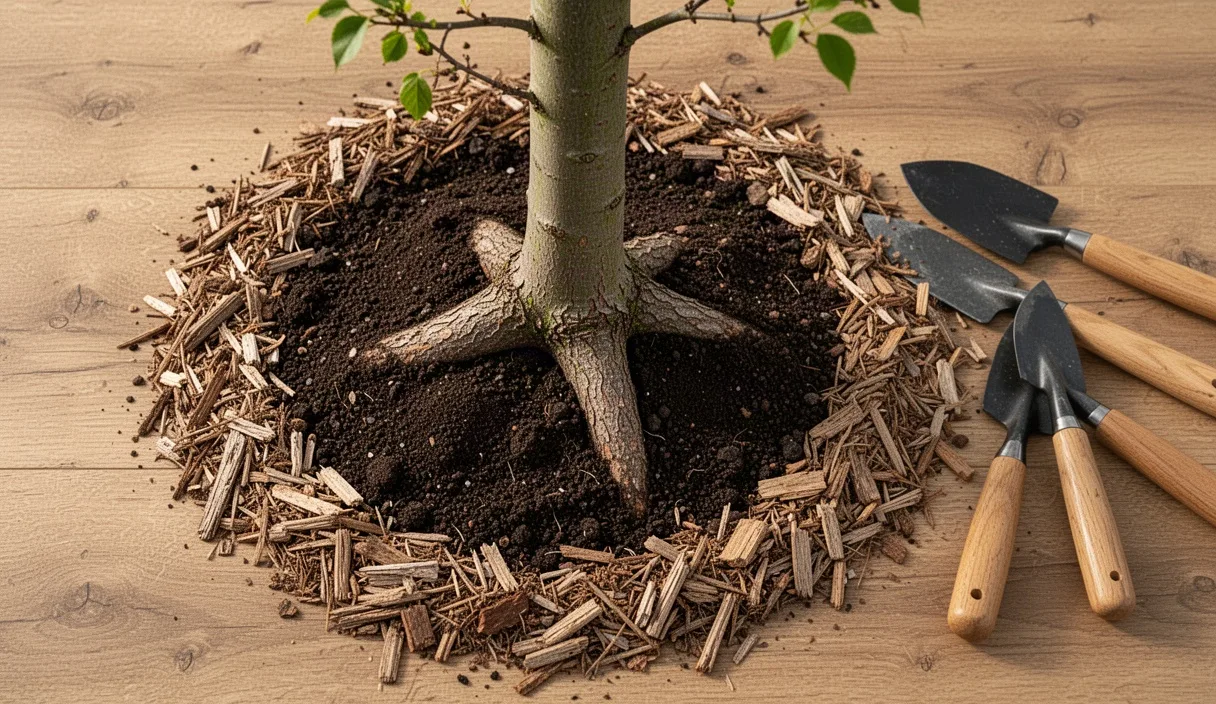
Burying the root flare kills trees. Nursery containers and burlap-wrapped root balls routinely place the main lateral roots 8 to 20 centimeters below the surface of the container substrate. Planting a sapling straight from the nursery without clearing this excess soil guarantees structural issues, trunk rot, and slow suffocation. Field studies show that trees installed with an exposed flare establish feeder roots faster, withstand drought with less tissue loss, and resist windthrow more effectively than trees planted even slightly below grade.
Every commercial planting specification needs strict rules for grade elevation. The root flare, also called the root collar or trunk flare, is the transitional zone where trunk tissue morphs into root architecture. It requires atmospheric gas exchange to sustain healthy cambial function. Covering this zone with mineral soil or excessive wood mulch triggers stem decay and stimulates adventitious root growth that later chokes the trunk. Getting the depth right on planting day avoids costly remediation or tree removal within five years.
Anatomy of the root flare and gas exchange requirements
Trunk bark and root bark possess entirely different anatomical structures. Trunk bark features a thick layer of suberized cork cells engineered to shed water and resist atmospheric pathogens, but it contains a low density of lenticels for radial gas transport. Root tissue features an epidermis or thin periderm designed to absorb water and dissolve oxygen from pore spaces between soil aggregates. When trunk bark remains submerged under moist soil, constant dampness softens the protective outer bark, breaks down suberin layers, and opens entry courts for soil-borne pathogens such as Phytophthora and Armillaria.
Gas diffusion drops off sharply as soil depth increases. Oxygen diffusion in compacted urban or suburban backfill is 10 to 100 times slower than in open air. The critical gas exchange zone for woody plants lies in the top 12 to 15 centimeters of the profile. At depths greater than 15 centimeters, ambient oxygen concentrations regularly fall below the 10 percent threshold required for woody root respiration. When the root flare sits deep, the vascular cambium at the base of the trunk suffers chronic hypoxia, starving the roots of carbohydrates because phloem transport stalls.
| Tissue Zone | Primary Function | Optimal Oxygen Level | Moisture Tolerance |
|---|---|---|---|
| Trunk Cambium | Radial xylem and phloem production | Atmospheric (approx. 20.9%) | Tolerates intermittent rain; rots under constant contact |
| Root Flare Zone | Mechanical load transfer and structural transition | 15% to 21% | High tolerance to cycling moisture; requires drying cycles |
| First-Order Lateral Roots | Anchorage and transport framework | 10% to 15% | Moderate to high; requires oxygenated pore spaces |
| Fine Absorbing Roots | Water and mineral nutrient uptake | 8% to 14% | High; dies if soil pores remain waterlogged for 48 hours |
Structural stability depends on the horizontal flare angle. First-order lateral roots spread outward from the trunk flare at an angle between 65 and 90 degrees relative to the vertical stem. This buttress formation dissipates lateral wind shear across the root plate. When buried, secondary adventitious roots emerge vertically toward the surface instead of expanding laterally, compromising the tree's anchoring leverage against high wind loads.
Why planting 5 centimeters too deep kills saplings in year four
Saplings planted 5 centimeters below grade rarely die immediately. In years one and two, young trees often leaf out normally because their internal carbohydrate reserves sustain branch expansion, and frequent nursery irrigation prevents water stress. The real damage surfaces in year three or four, precisely when establishment irrigation tapers off and the tree's canopy water demand doubles. The root system, restricted to deeper and oxygen-depleted soil zones, fails to produce the necessary absorbing root volume to support the leaf area.
Stem girdling roots (SGRs) represent the most lethal consequence of deep planting. As buried trunk tissue starves for oxygen, the tree generates small adventitious roots along the submerged stem. These roots hit compacted backfill walls and circle around the buried trunk inside the original planting hole. As the main trunk expands in diameter, these encircling roots expand as well, pressing directly against the vascular cylinder.
- Year 1: Adventitious roots initiate along the buried stem collar; shoot extension matches standard nursery growth rates.
- Year 2: Lateral roots turn inward or circle along the container edge; slight reduction in terminal bud size on upper branches.
- Year 3: Encircling roots reach 8 to 15 millimeters in diameter, pressing into the trunk bark; early fall coloration appears 14 to 20 days ahead of schedule.
- Year 4: Compressed xylem blocks upward transpiration; vascular phloem collapses under the girdle, causing root starvation, branch dieback, and sudden summer desiccation.
Species sensitivity varies significantly. Acer rubrum (red maple), Tilia cordata (littleleaf linden), and Prunus species show extreme vulnerability to stem girdling roots within 48 months of deep planting. Quercus (oak) species resist adventitious rooting along the stem but develop collar rot from water-mold pathogens when submerged under 5 centimeters of damp silt loam. Once a trunk shows a flattened side where an encircling root crosses it, vascular transport drops by 35 to 65 percent in that quadrant, leading to canopy thinning directly above the compression zone.
Digging the planting shelf: firm bottom versus tilled perimeter
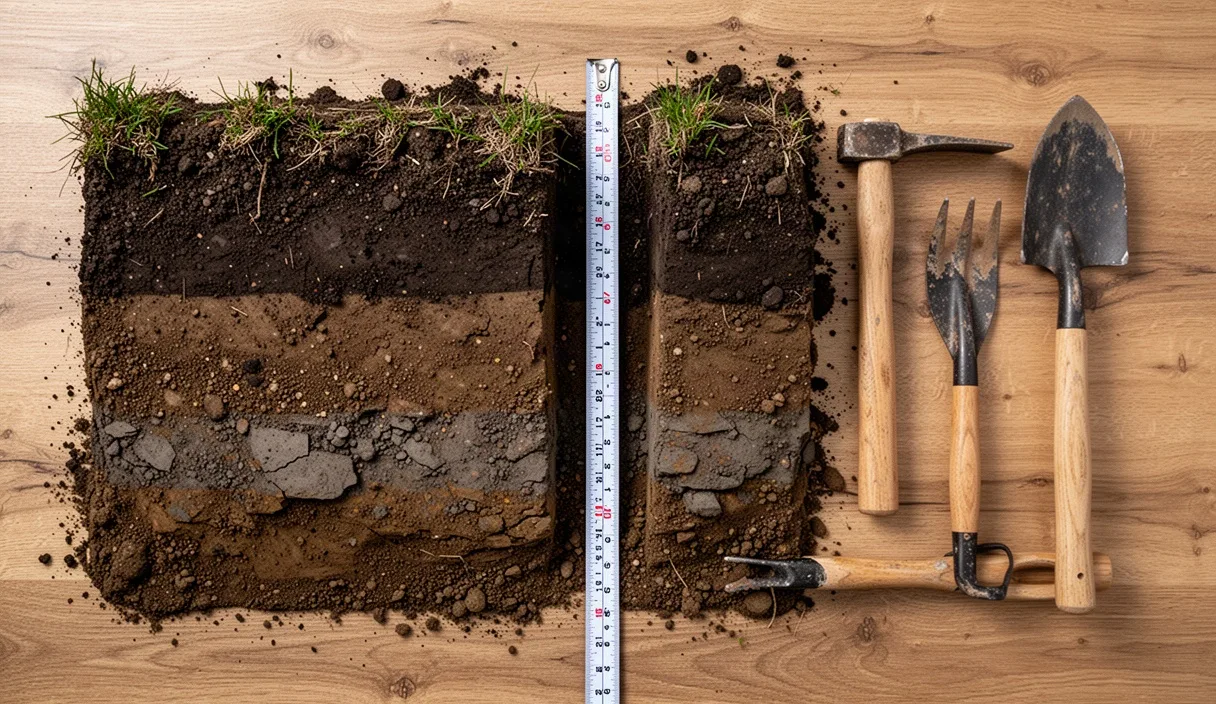
Excavating a flat-bottomed bowl with loose soil underneath the root ball causes disastrous post-planting subsidence. A root ball weighing 70 kilograms will compress 8 centimeters of loose, dug-up soil by at least 3 to 4 centimeters once saturated with water. This drop pulls the exposed flare down below the surrounding grade within the first month. The base of the excavation directly beneath the root ball must remain completely undisturbed native soil.
The modern specification calls for a firm central pedestal and a wide, sloped shelf. Excavate the center of the pit to a depth measured precisely from the bottom of the root ball to the base of the root flare, minus 2 to 3 centimeters to ensure the flare finishes slightly elevated. Sloping the hole outward at a 45-degree angle doubles or triples the surface area of loose soil available for horizontal root penetration, without introducing the risk of downward ball movement.
Excavating the central pedestal
Measure the root ball before setting shovel to earth. Remove the burlap, twine, or container material from the top of the root package, then scrape away excess potting soil until you identify the first large structural root spreading horizontally from the trunk. Measure the distance from that root to the bottom of the root ball. If this distance is 32 centimeters, dig the central pedestal exactly 30 centimeters deep. Keep the bottom flat and undisturbed. Do not step on or break up the subsoil shelf beneath the ball footprint.
Expanding the horizontal perimeter
Till, loosen, or excavate the surrounding soil horizontally to a diameter two to three times wider than the root ball. Radial root expansion proceeds through the loosest, most aerated soil layer. Fracturing this perimeter removes the slick, glazed interface left by augers or flat-blade shovels on heavy clay soils. If an auger was used, rake the perimeter walls with a pickaxe or hand mattock to expose the native soil pores before backfilling.
Backfill methods to avoid air pockets without soil compaction
Do not stomp the backfill with heavy work boots. Applying human body weight (70 to 95 kilograms) focused on a heel creates localized bulk density spikes exceeding 1.6 grams per cubic centimeter, which halts root tip elongation in clay and loam soils. Conversely, leaving large dry voids causes fine roots to dry out and die upon contact. Soil settlement must occur through hydraulic action rather than mechanical force.
Use native soil for the entire backfill operation. Introducing peat moss, sand, or commercial potting soil creates a textural interface that disrupts natural water movement. Water behaves differently across soil boundaries; a sandy or highly organic backfill pocket will either shed water away from the root ball or act as a subterranean drainage sump during heavy rains, drowning the roots. Backfill with the mineral soil that came out of the hole, breaking up large clods to a diameter under 25 millimeters.
Hydraulic backfilling procedure
- Set the tree on the firm central pedestal. Check that the root flare sits 2 to 4 centimeters above the finished landscape grade.
- Fill the excavation shelf halfway with native soil. Do not tamp with boots; press lightly with your hands or the handle end of a shovel to stabilize the root ball.
- Run an open hose at low pressure (10 to 15 liters per minute) into the backfill zone, or pour two 20-liter buckets of water around the ring.
- Insert a smooth rebar rod or shovel handle vertically into the slurry around the perimeter, moving it back and forth to purge trapped air bubbles. Watch the soil settle naturally.
- Add the remaining native soil up to the level of the surrounding grade, tapering it gently down from the exposed root flare. Avoid placing any backfill over the top of the root ball itself.
- Apply a second thorough watering to finalize settlement. If depressions form, top them with dry native soil without pressing down.
Post-planting settling checks and correction techniques
Inspect the tree 30 days and 90 days post-installation. Natural soil consolidation occurs during the first three irrigation cycles. Take a straight edge, such as a 1.2-meter carpenter's level, lay it across the planting pit from undisturbed soil to undisturbed soil, and measure the distance down to the top of the root flare. The flare must remain visible at or up to 3 centimeters above the level line. If it rests below the level line, you must intervene before the tree begins extensive root generation.
When settling drops the flare 2 to 4 centimeters below grade, perform a manual surface pull. Use a hand trowel or an pneumatic air-excavation tool to strip back backfill and mulch until the top of the primary root flare is fully exposed to ambient air across a radius of 20 centimeters around the trunk. Grade the soil away from the stem at a 1:4 slope, creating a wide saucer that holds moisture around the perimeter while leaving the trunk collar dry and elevated on a small island.
If the tree settled 5 centimeters or more below grade, surface excavation creates a bowl that collects standing water during storm events, defeating the purpose. In this scenario, dig the tree out entirely and replant it. Re-excavate the loose backfill around the root ball, lever the root ball out with shovels placed beneath the base, pack native soil firmly beneath the pedestal, and reset the tree at the correct elevation. Perform this lift within the first dynamic growth window (autumn or early spring) before woody lateral roots grow out into the backfill.
Common mistakes
Site managers and landscaping crews frequently introduce systemic errors during installation that compromise the planting depth:
- The volcano mulch collar: Piling wood chips 10 to 15 centimeters deep directly against the trunk bark mimics deep planting, holding moisture against the collar and inducing adventitious stem roots. Keep mulch 8 centimeters away from the trunk.
- Accepting the container soil line: Assuming the nursery planted the tree at the right depth. Over 75 percent of container-grown stock has the root flare buried deep under potting mix.
- Digging the hole too deep: Digging the pit 10 centimeters deeper than the root ball and backfilling loose soil underneath guarantees the tree will sink downward as the loose soil settles under watering.
- Rototilling the base: Breaking up the subsoil at the bottom of the hole creates a squishy, uncompacted base that slowly drops the tree by 4 to 8 centimeters over two seasons.
- Leaving wire baskets and burlap over the flare: Folding excess burlap and wire over the top of the root ball piles up 4 centimeters of foreign material that traps sediment directly against the trunk flare.
Practical next steps
Immediate action on current and upcoming planting sites prevents collar-related sapling loss. Apply these rules directly in the field:
First, update landscape planting specifications to define depth strictly by the root flare position, not the root ball surface. Write into contracts that any tree delivered or installed with a buried flare must be excavated or rejected prior to payment. Equip field crews with hand probes, soil knives, and stiff hand brushes so they can quickly clear excess soil off the top of nursery root packages during unloading.
Second, audit existing trees installed over the past 36 months. Probe the base of the trunk with a smooth wire pin or thin screwdriver. If you must push down more than 3 centimeters into the soil to feel the hard wood of the first lateral roots, schedule an air-spade excavation or hand excavation to expose the flare. Where girdling roots under 25 millimeters in diameter have begun wrapping around the submerged stem, cut them clean with sterilized bypass pruners before they fuse into the trunk wood. For large or severely girdled trees, contract an ISA-certified arborist to assess whether structural mitigation or complete removal is the safest course.