 Arboris Botanical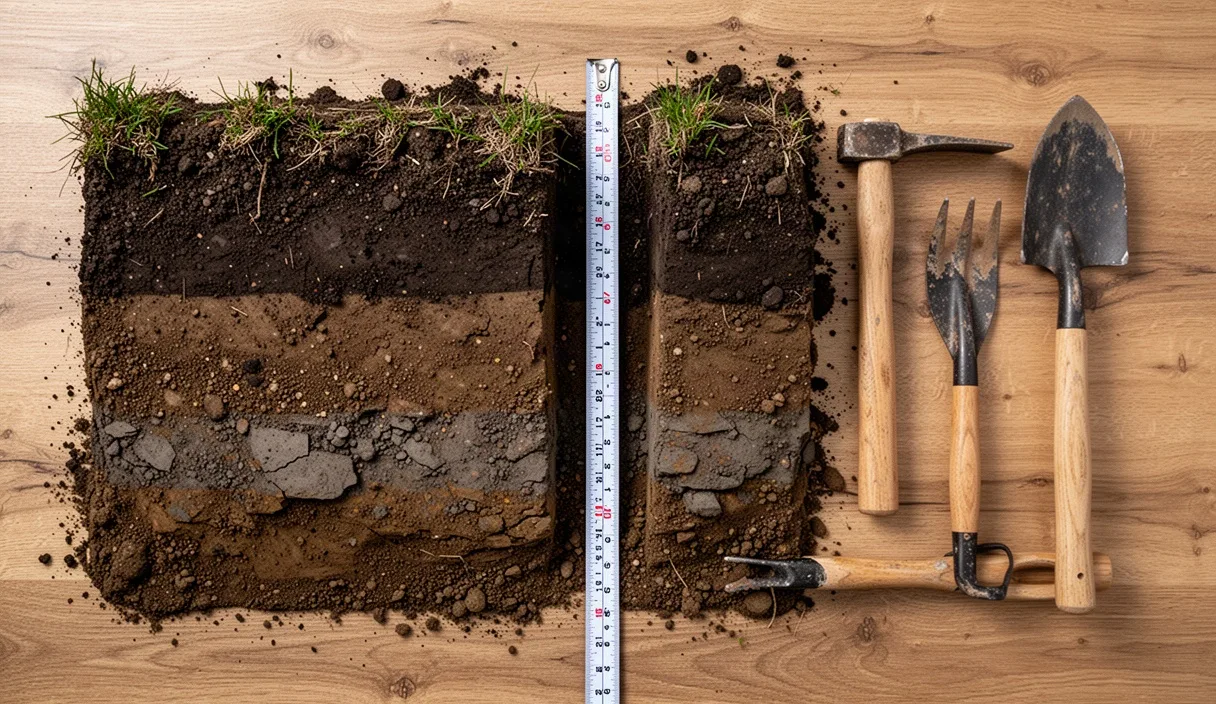
Surface soil tests lie often. A standard agronomic core sample takes six inches of topsoil, dries it, shakes it through a sieve, and gives you nitrogen, phosphorus, potassium, and pH readings. That data tells you what the grass roots see right now. It tells you nothing about the dense, impenetrable layer sitting 18 inches down that will drown your rootstocks three winters after planting.
Fruit trees are long-lived woody perennials with deep rooting architectures. A semi-dwarf apple on M.7 or MM.106, a sweet cherry on Mazzard, or a standard pear on OHxF 97 drives anchoring and feeder roots down 36 to 60 inches into the profile. When those descending roots slam into an unmapped compaction zone, growth stalls, anchorage fails, and wet-season root rot sets in. You must inspect the profile down to at least five feet before ordering rootstocks.
Why standard surface soil tests miss subsoil compaction zones
A standard core sampler reaches 6 to 12 inches into the ground. In historical pastures, old orchards, or cleared building sites, the top 8 inches often look friable, dark, and well-aerated because of annual grass turnover and shallow tillage. The catastrophe hides directly below the reach of the foot-probe.
Subsoil compaction happens through two distinct mechanisms: mechanical traffic and illuviation. Mechanical plow pans and wheel-traffic hardpans typically sit between 10 and 22 inches deep. Decades of tractor passes or single-pass heavy grading equipment compress wet subsoils, raising bulk density beyond the threshold where tree roots can penetrate. Most deciduous fruit tree roots stop growing when soil bulk density exceeds 1.45 grams per cubic centimeter in clay or 1.65 grams per cubic centimeter in sandy loam.
Illuvial hardpans, including natural clay pans and fragipans, form over thousands of years as fine silicate clay particles wash down through the profile and cement together in the B horizon. A surface test might show a balanced, loamy soil with a pH of 6.5, while at 20 inches deep, a dense argillic horizon with 48 percent clay stops both water drainage and oxygen exchange. The tree roots grow outward horizontally in the top layer, leaving the tree prone to wind-throw and severe summer drought stress.
| Profile Layer | Typical Depth | Standard Test Measures | Tree Root Impact Missed |
|---|---|---|---|
| A Horizon (Topsoil) | 0 to 8 inches | NPK, Organic Matter, pH, CEC | Shallow feeder roots only; ignores anchorage stability |
| Plow Pan / Traffic Layer | 10 to 18 inches | Not sampled | Bulk density exceeding 1.55 g/cm3 halts taproot descent |
| B Horizon (Subsoil) | 18 to 42 inches | Not sampled | Perched water tables, heavy clay accumulation, root-killing anaerobic pockets |
| C Horizon (Parent Material) | 42 to 60+ inches | Not sampled | Fractured bedrock, gravel seams, permanent water tables |
Excavator test pit protocol for fast depth profiling
Ditch the shovel. Digging by hand to five feet in compacted ground is slow and leads to small, conical holes that obscure soil horizons. Rent a 1.5-ton to 3.5-ton mini-excavator with a 18-inch or 24-inch toothed trenching bucket. You can dig, log, and backfill six profile pits across a five-acre planting block in four hours.
Dig pits five to six feet deep, three feet wide, and six to eight feet long. Step one end of the trench down like stairs so you can exit safely. Never enter an un-shored trench deeper than four feet if the soil is loose, sandy, or saturated: inspect deep pit floors and walls from the surface using a long trenching spade or hand auger. Orient the pit walls perpendicular to the primary slope of the field to expose how subsurface water moves across the gradient.
Expose and evaluate the profile wall using this sequence:
- Clean the profile face. The excavator bucket smears clay across the pit wall, creating an artificial, shiny crust that obscures layers. Take a flat-bladed spade or mason's trowel and pick away two inches of soil along a vertical strip from the surface down to the floor.
- Probe resistance manually. Push a pocket knife blade or a 1/4-inch steel rod horizontally into the cleaned wall every four inches. Mark where resistance spikes sharply. A sharp jump in required force indicates a hardpan or plow layer.
- Delineate horizon boundaries. Note the depth where topsoil color transitions into subsoil, where clay content jumps, or where root density drops off completely. If existing weed or grass roots hit 14 inches and bend 90 degrees sideways, you have found your root-limiting boundary.
Reading the water table mark through soil mottling colors
Dry summer soil is deceptive. A pit dug in August might look completely dry down to five feet, tempting you to plant peach or cherry rootstocks that demand dry feet. That same pit can sit submerged under water for four months straight during the winter. You do not need to stand in the rain to know this: the soil profile records its own saturation history through redoximorphic features and mottling.
Soil color comes largely from iron and manganese coatings on mineral grains. When soil is well-drained and oxygen is abundant, iron remains oxidized (ferric state), producing bright red, brown, and yellowish-tan colors. When the soil remains saturated for more than two consecutive weeks, microbial activity consumes the dissolved oxygen. Microbes switch to anaerobic respiration, reducing ferric iron to soluble ferrous iron. This process strips the bright iron coatings off mineral grains.
Look for these two distinct visual warnings on your freshly cleaned pit wall:
- Gleying: Continuous zones of dull, pale gray, bluish-gray, or greenish-gray soil (Munsell chroma of 2 or less). Gleying means persistent, prolonged saturation and total oxygen depletion. If you see solid gray clay at 22 inches, that is the maximum depth rootstocks can survive during wet winters. Planting below this mark drowns the root tips.
- Mottles (Redox Concentrations): High-contrast splotches or spots of vivid orange, rust-red, or dark brown surrounded by a paler gray matrix. Mottles mark a fluctuating water table. As the water rises, iron dissolves; as the water recedes and air enters the drying pores, iron precipitates into concentrated orange and rust-colored spots.
If mottling appears at 16 inches, your effective rooting depth for sensitive species like peaches, nectarines, and sweet cherries is only 16 inches. Apples on rootstocks like Antonovka or pear rootstocks can tolerate short saturation spells, but even they suffer if mottling sits within 12 inches of the grade.
Percolation test math for heavy clay landscapes
Surface percolation tests tell you how fast a puddle disappears; depth-specific percolation tests tell you if your planting hole will become an underground sump. Run percolation tests inside your excavator pit or in 30-inch-deep post holes drilled with a tractor auger.
Prepare the test hole properly. If using an auger, the rotating bit glazes and smears the clay sidewalls into a polished cylinder that stops water movement. Scrape the bottom and sides with a wire brush or hand trowel to reopen the natural soil pores. Clear out all loose debris. Add two inches of clean coarse sand or pea gravel to the bottom of the hole to prevent scouring when you pour water.
Saturate the profile first. Never run a percolation test on dry clay. Smectite and illite clays swell when wet, constricting pore spaces. If you pour water into dry clay, it will drop rapidly down shrink-swell cracks, giving a false fast reading. Fill the test hole with water to a depth of at least 14 inches and maintain that level for four to eight hours. Let it sit overnight. Run the real test the following morning on fully swelled, saturated ground.
Calculate the true drop rate:
- Adjust water level to eight inches above the gravel base.
- Lay a straight reference board across the top of the hole.
- Drop a measuring tape or rigid ruler down to the water surface, referencing the bottom edge of your board.
- Record the exact drop in water level every 30 minutes for three hours. If water drops very slowly, measure every 60 minutes.
- Use only the final hour of readings to determine your steady-state percolation rate:
Percolation Rate (inches per hour) = Drop in inches / Time in hours
Interpret your results directly against rootstock tolerance. A drop of 1.25 to 2.5 inches per hour is ideal for most deciduous tree fruits. A drop between 0.5 and 1.0 inch per hour requires planting on berms or selecting water-tolerant rootstocks like OHxF 87 for pears or plum-derived rootstocks like Krymsk 86 for stone fruits. A drop rate below 0.35 inches per hour means the soil has severe drainage limitations: bare-root trees placed in standard holes here will die from Phytophthora or crown asphyxiation within 24 months without heavy mechanical intervention or tile drainage.
Corrective subsoiling specs to shatter hardpan layers
Do not attempt to fix deep hardpans by adding sand, peat moss, or compost to individual planting holes. That practice builds a literal bucket: the amended loose soil holds water, while the surrounding compacted native clay prevents outflow, drowning the root system. You must break the hardpan continuously across the entire orchard row.
Use a heavy tractor and a dedicated agricultural subsoiler or single-shank ripper. A standard chisel plow or disc harrow is useless here; they rarely penetrate deeper than 10 to 14 inches and often create a new compaction pan right at their working depth. Subsoiling requires high drawbar power: plan on 35 to 50 horsepower per shank for a tool working 24 to 32 inches deep in dense clay loam.
Operate the ripper shank four to six inches below the bottom of the identified hardpan. If your excavator pit showed a traffic pan running from 12 to 20 inches deep, set your shank depth to 24 or 26 inches. Dragging the shank above the pan merely scratches the surface; dragging it unnecessarily deep into wet, un-compacted C-horizon clay wastes fuel and bogs the tractor.
Soil moisture conditions must be dry for subsoiling to work. If you pull a ripper shank through wet clay, you will fail to shatter the pan. The shank will slice a narrow, smeared slot through the wet earth, creating an underground smear that glazes over and seals tighter than before. Subsoil only during late summer or early autumn when the soil profile is dry and brittle below the 18-inch mark. As the winged foot of the subsoiler moves through dry, brittle subsoil, it fractures the hardpan upward in a 45-degree cone of relief, shattering the compaction zone across a three-foot lateral swath.
Execute two passes along the tree rows. Make the first pass directly down the planned planting line. Make a second pass at a 45-degree angle across the row line to create intersecting fracture planes. Keep heavy equipment off the ground after subsoiling: a single pass with a fully loaded dump truck or water tanker over shattered ground will immediately re-compact the loosened profile.
Common mistakes
A frequent error is relying on tractor augers to dig individual planting holes in damp clay ground. The auger spins against the sides of the hole, polishing the soil clay particles into a hard, slick, impenetrable clay pot. Roots cannot break out, and drainage water cannot get out. If an auger must be used, hand-scarify the entire perimeter with a pickaxe before setting the tree.
Another major mistake is testing soil profile drainage during severe drought without pre-soaking the test pit. Dry cracked soils swallow water rapidly for thirty minutes, giving landowners false confidence. Once the clay hydrates and expands three hours later, drainage drops to near zero.
Landowners also routinely mistake sand or gravel layers for guaranteed drainage. An excavator pit often reveals a coarse gravel or sand seam at 30 inches that is fully saturated because it sits in a low depression trapped by an underlying clay shelf. Without an outlet, a gravel seam acts as an underground channel that directs excess runoff straight to your tree roots.
Practical next steps
Do not purchase trees until the site profile is mapped. First, mark your tentative planting rows on the landscape using flags. Contract a mini-excavator operator or rent the machine for a weekend to dig three to five test pits per acre across high, middle, and low topographical zones.
Log your horizon depths, photograph the pit walls under clear light, and check for orange mottles or gray gleying. If the profile shows a hardpan within 24 inches but bright, uniform colors beneath it, mark the block for autumn subsoiling. If the profile reveals shallow bedrock or permanent water tables within 18 inches of the grade, abandon plans for taprooted stone fruits and redesign the block with high raised mounds, drain tiles, or surface swales. If site conditions are highly variable, complex, or show signs of severe contamination from previous industrial uses, hire a certified professional soil scientist to run full bulk density and soil classification mapping before breaking ground.